Portrait Modelling
Started the day, as normal, by checking and double checking all of yesterday’s measurements. Lots of intuitive modelling today, probably the fastest we’ve ever modelled before. Instead of back to back modelling, for the profile, we stood very far back from the model and the clay to look at the profile.
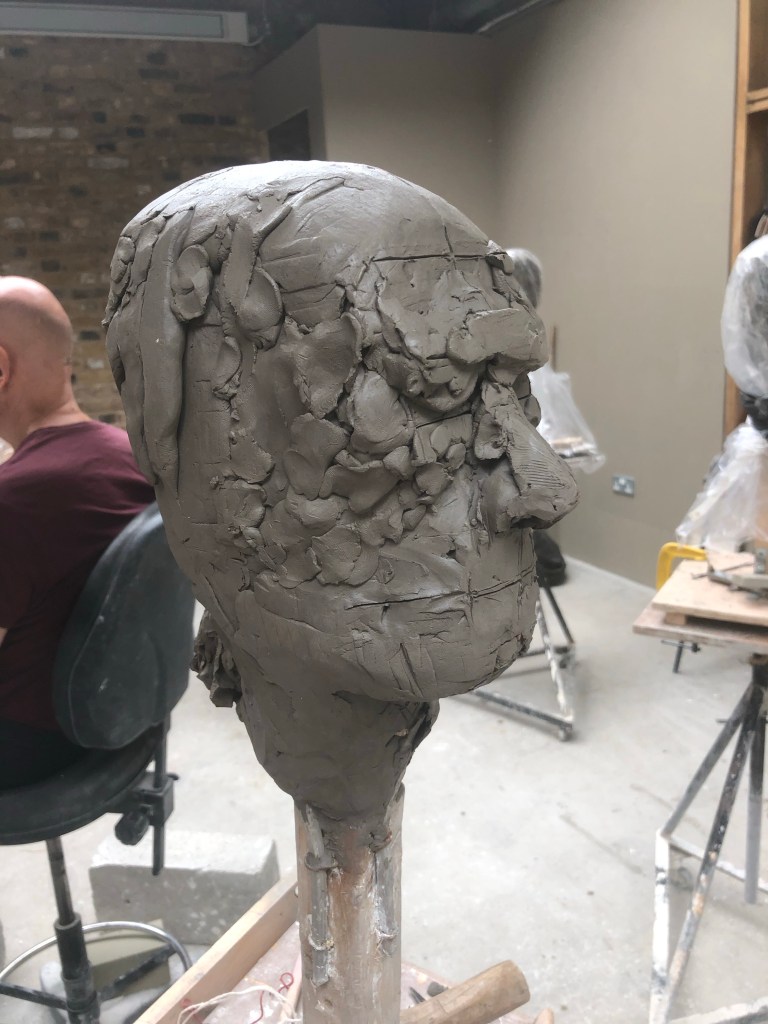
After working on the overall profile, we started modelling the ears. Beginning with the height, width and distance from the tragus notch. We modelled the ear separate from the portrait. Rolling out clay into a raindrop shape, then squeezing the thickest part to give a rough ear shape, being careful not to use too much clay. After this, when the clay is thin enough, start to role and fold the clay as if it was a drapery study to get the movement of the structure. This gives a car more natural appearance than building up layers like you would normally with modelling. we spent no more than five minutes on each ear.
To apply the ear, line up the mark of the tragus notch (measured beforehand) on the head and the ear, then make the back of the ear and the pitch of the nose parallel. Never guess, always have evidence to reinforce your decisions. After the initial connection, reinforce this with a small sausage of clay behind the ear, which is found in life too. Make sure the gaps between the top of the ears and the skull are lifelike and the connection of the lobes also work. It’s more important that ears look even (unless they are clearly not in the person) than are highly modelled.
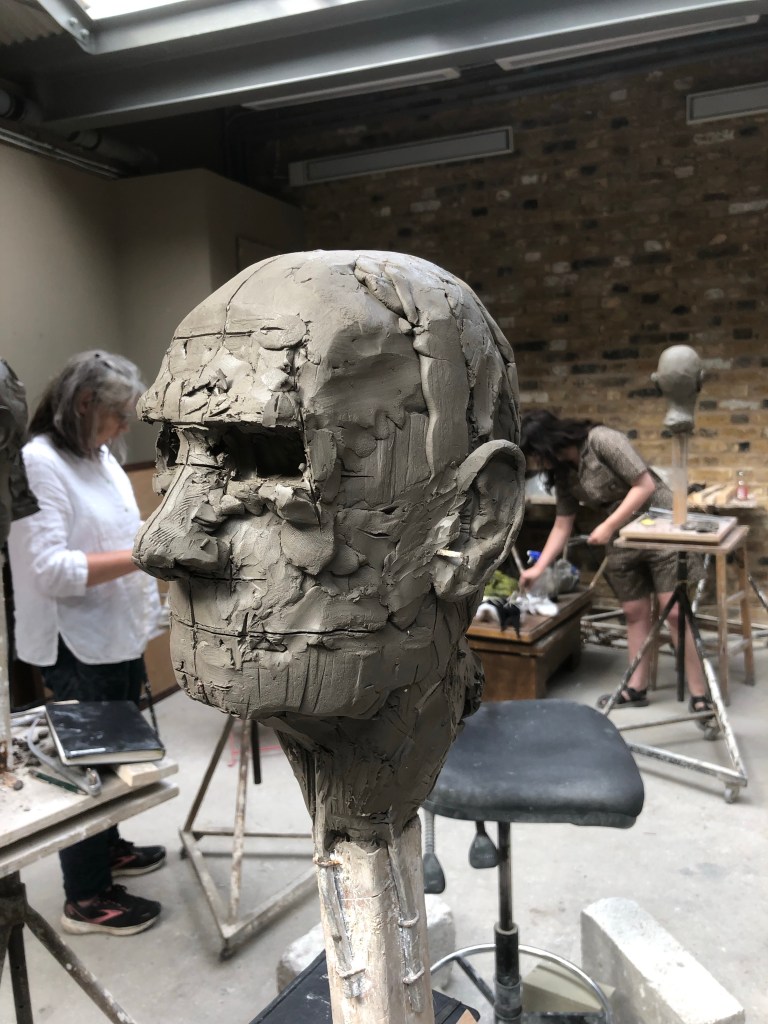
We ended the day by marking and hollowing out the eye sockets, being especially careful about these measurements.

Leave a comment